How to Create a Facebook Event for Your Small Business Event
- Feb 28, 2024
- 5 min read

Facebook is a great tool for staying connected with friends and clients. One way to connect digitally is by creating a Facebook Event. Creating one of these events is a great way to keep your invitees in the loop with any information or updates about the party or show. Here’s how to do it:
Create a Facebook event on DESKTOP (Scroll down for Mobile Instructions)
1. At the top of your homepage, click the dots icon, then the “Event” tab under the Create section on the right. A small pop-up will open where you can begin creating your event.


2. Begin filling your event’s information (title, event date, and time) into the text boxes.
3. You can add a cover photo or video (new option) to grab attention. Click the “edit” button at the top. Then, upload your photo or video from your desktop.
4. Next, select whether the event is in person or virtual with the drop-down menu.
5. If you are hosting a virtual event, options will appear to choose how to attend the event. If you are using Zoom, just select “other”. You can provide the Zoom link in a post on the event page.


6. There is a drop-down menu with the option to create a public or private event at the button labeled “Who can see it?”. A private event will only be visible to those invited, while a public event is visible to everyone. Or you can create an event for your Facebook Group page. See image below.

7. If you choose this event for a group, another drop-down will appear to let you choose between “private” (group members only) OR “public”. Making the group event “public” means your attendees can invite another guest that may not be your Facebook friend.

8. Add event details like you would on a party invitation.
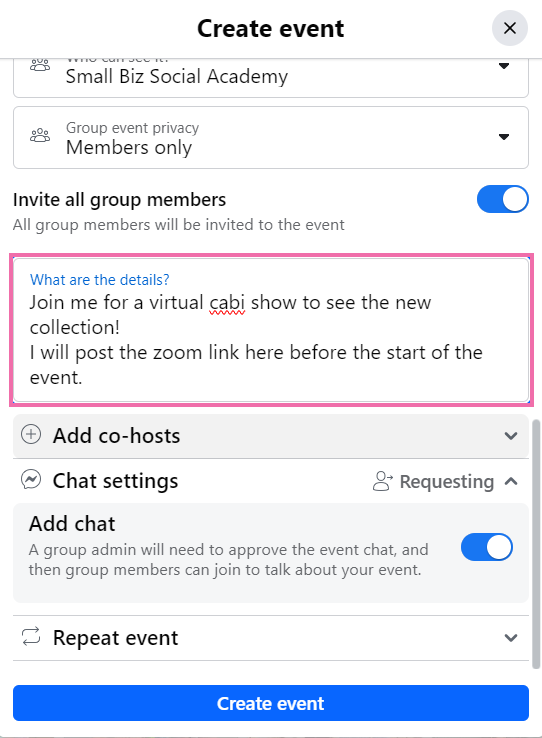
9. To add a co-host to your event, type their name into the box labeled, “Co-hosts”. When their profile appears in the drop-down menu, click on it to add them as a co-host.

10. Once you click “create event” at the bottom, you will be prompted to invite people. You can search with the toolbar or scroll through the list in the box. Then click “Send invites” in the bottom right corner. Don’t have your guest list yet? No worries, you can invite more guests later.

11. Once you create your event, it will bring you to the event page. From here, you can also invite guests to your event. Click the “Invite” button at the top to invite your guests. A pop-up window will open, and here you can begin typing in or clicking your friends’ profiles to invite them to the event. Once you’ve selected all your guests, click “Send Invites” at the bottom right corner.
12. You have finished creating your event! Now, you can update your guests by posting a status, photo, or video directly on the Event page for your guests to see.
13. If you need to cancel or delete your event, tap the three dots in the upper right corner, followed by cancel. You will then be prompted to either cancel or delete. Selecting cancel means that Facebook will keep all event details in case you want to use them to reschedule. Selecting delete will delete all posts and event details. Only delete if you are done with the event or are positive you don’t want it anymore.

Create a Facebook event on a MOBILE DEVICE
You can also create a Facebook event on the mobile app, but the process is a little bit different. Here’s how to create a Facebook event using the iPhone app:
On the bottom of your screen, press the menu button in the bottom right corner. Once there, press “Events”, you might have to press “See more” for events to show up.


2. Then, tap the “+” symbol at the top to create your event.

3. Begin filling in the information for your event. To add a cover photo, tap on either pick a GIF, gallery, or upload. The Gallery has pre-made backdrop photos. GIFs can be fun but sometimes grainy, so be careful. Otherwise, you can upload your photo from your camera roll. The cover photo is the first thing people see, so choose wisely!


4. After you have made your selection or uploaded an image, hit “save” at the bottom.

5. To change the date and time of your event, press on the box below the event title that says, “Start date and time.” From there, use the calendar and time menu to choose the date and time of your event. Then, add an end time with the small button on the top right. Once you have selected the correct date and time, press “save.”


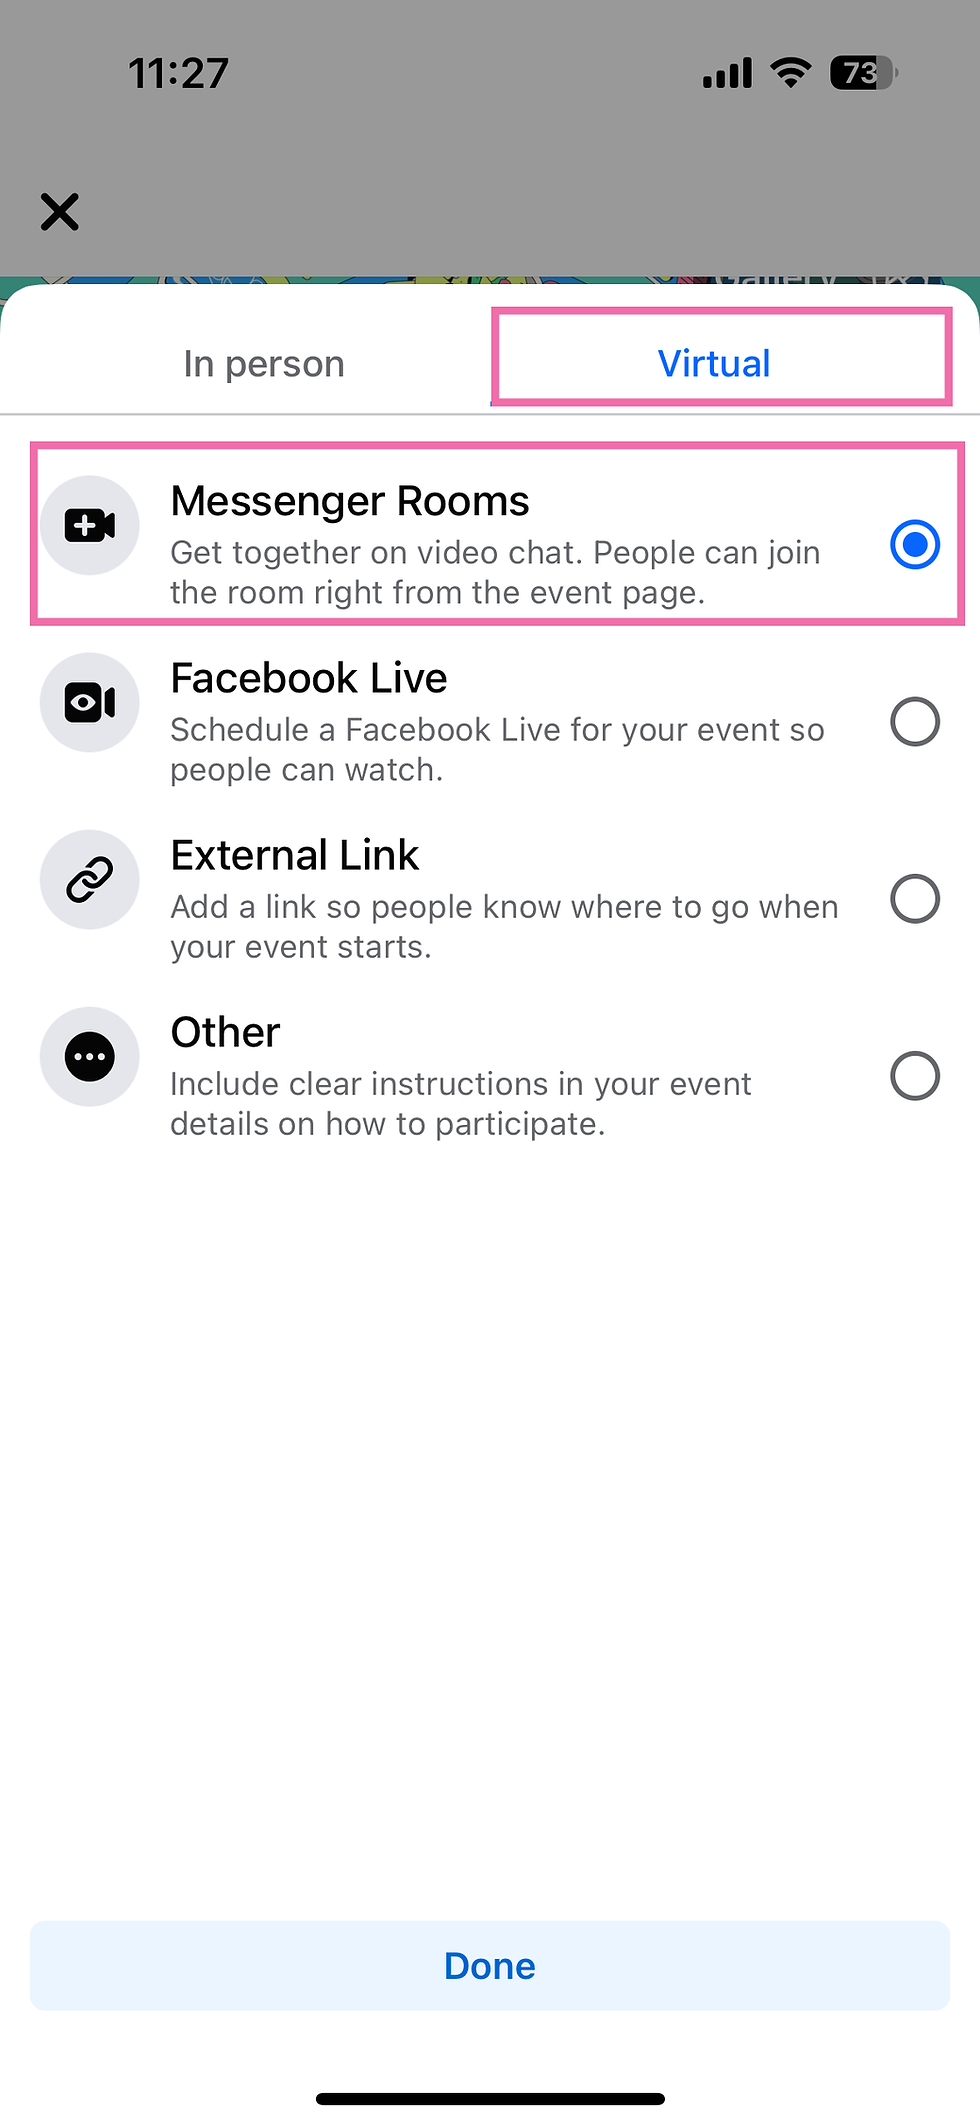
6. Choose “in person” or “virtual”. If it’s “in person” you will be prompted to enter an address. If it’s “virtual”, a pop-up will appear to choose how to host the event. For this one, I chose to use “Messenger Rooms.” But, you could also choose a “Live Facebook Event,” or “other” like if you were hosting on Zoom.

7. Then choose “Private” or “public” event.
8. If you’d like to allow guests to invite people to this event, leave this switched on. If not, toggle it off. I usually opt to turn this on, that way you get new faces at your event that you may not already be friends with on Facebook.

9. Type in the description for your event right under the location.
10. If you’d like to add any co-hosts to your event, press “Co-hosts” to add them. Type in your co-host’s name and press on their profile to add them.

11. Underneath co-host is Additional settings. Here is the option for guests to share the event link. Toggle that on to make it easy for guests to share the event with their friends.

12. Double check all event info, then tap “create event” at the bottom.

13. Once on the event page, you can invite guests by pressing the “invite” button. Then, type in your guests’ names and tap on their profiles to add them as guests


14. To post an update or information about your event, you can create a status visible on the event’s page for all guests and co-hosts, just like any other Facebook status.
15. If you need to cancel or delete your event, go to “Manage” (blue button at the top). Canceling will keep all the event details (in case you want to use them to reschedule). Deleting will delete all posts and event details. Only delete if you are done with the event or are positive you don’t want it anymore.

Want one-on-one training or more help?
Promote Creatively offers Training sessions for Small Businesses. Schedule a free 30-minute consultation here for more!


Comments