How to Create Facebook Events for in-person and Virtual Shows
- mattiesprague
- Apr 9, 2020
- 4 min read
Updated: May 14, 2020

Facebook is a great tool for staying connected with friends and clients. One way to connect digitally is by creating a Facebook Event. Creating one of these events is a great way to keep your invitees in the loop with any information or updates about the party or show you’re hosting, and can be done quickly and easily! Here’s how to do it:
Create a Facebook event on DESKTOP (Scroll down for Mobile Instructions)
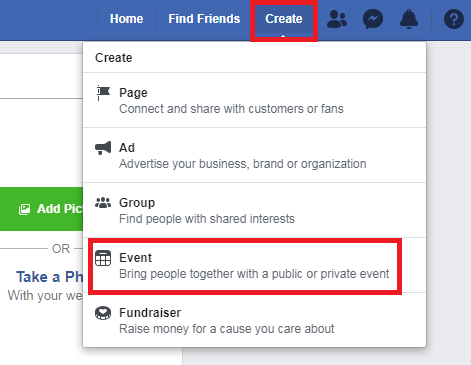
1. At the top of your homepage, click to open the “Create” tab. From there, click on “Event”. This will open a small pop-up where you can begin creating your event.


2. On the top left side of this pop-up, there is a drop-down menu with the option to create a public or private event. A private event will only be visible to those who are invited, while a public event is visible to everyone.

3. Begin filling your event’s information (title, description, location) into the text boxes. To set the date and time of your event, click the little calendar/clock icons and choose your date/time.


4. To choose a photo for your event, click “Upload Photo or Video” and upload your photo.


5. If you would like to create a schedule for your event, click “Add Schedule”. This will open another pop-up window. From there, you can type in each item in the schedule, and set a time at which it will occur. To add another item to the schedule, click “Add Item”. When you’re done, press “Save” to close the scheduling window. The schedule is typically used if you have multiple times for the same event.


6. To add a co-host to your event, type their name into the box labeled “Co-hosts”. When their profile appears in the drop-down menu, click on it to add them as a co-host.

7. At the bottom, there are two checked boxes labeled “Guests can invite friends” and “Show guest lists”. If you’d like to allow your guests to invite other people to the event, leave the “Guests can invite friends” box checked. If not, uncheck it. If you’d like the guest list for your event to be shown on the event page, leave “Show guest lists” checked. If not, uncheck the box.

8. To finish creating your event, click the blue box at the bottom of the pop-up window. It will either say “Create Private Event” or “Create”, depending on if you chose a private or public event.

9. Once you create your event, it will bring you to the event page. From here, you can invite guests to your event. Click on the “Invite” button to begin inviting your guests. A pop-up window will open, and here you can begin typing in or clicking your friends’ profiles to invite them to the event. Once you’ve selected all your guests, click “Send Invites” at the bottom right corner.


10. You have finished creating your event! Now, you can update your guests by posting a status, photo, or video directly on the Event page for your guests to see.
Create a Facebook event on MOBILE
You can also create a Facebook event on the mobile app, but the process is a little bit different. Here’s how to create a Facebook event using the iPhone app:
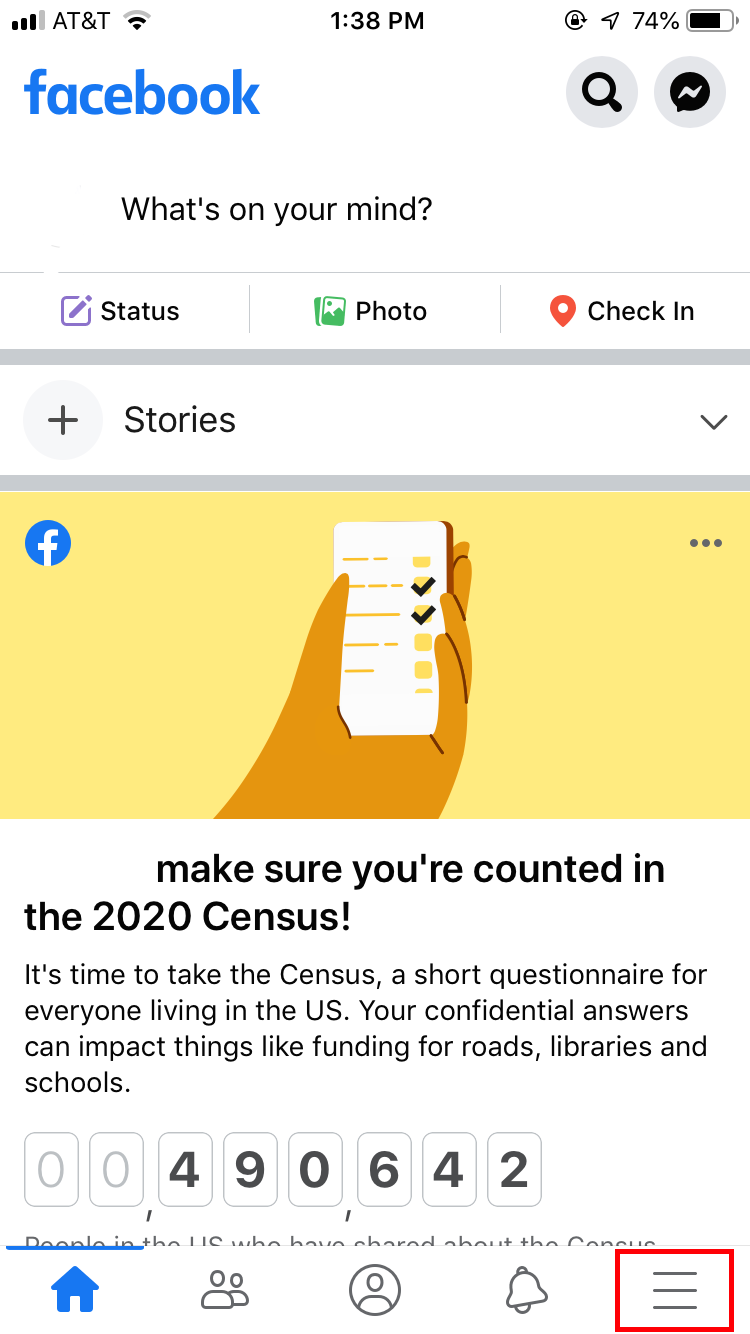
On the bottom of your screen, press the menu button in the bottom right corner. Once there, press “Events”, and then “Create”.


2. Choose to create a private or public event.

3. Begin filling in the information for your event. To add a cover photo, press on the small camera icon next to the space for your event title. Choose “Upload a photo” and select the picture you want to use as the cover photo, then upload it.


4. To change the date and time of your event, press on the box below the event title and above the location. It will most likely say “Today at _:__”. From there, use the calendar and time menu to choose the date and time of your event. Once you have selected the correct date and time, press “Ok” to save.


5. To choose the location for your event, press “Location” and begin typing in the event’s location. If it appears on the drop-down menu, press it to set it as the location. If not, type the location in and press “Just use _________” (your location services MUST be turned on for this.) For Virtual Events you can Type "Virtual" but click "JUST USE VIRTUAL" So it doesn't put in an actual location.


6. Type in the description for your event right under the location.

7. If you’d like to allow guests to invite people to this event, leave this switched on. If not, press on the button to switch it off.

8. If you’d like to add any co-hosts to your event, press on “Co-hosts” to add them. Type in your co-host’s name, and press on their profile to add them. Once you have finished adding your co-hosts, press “done”.


9. Once you have finished filling in all the information for your event, press “Create”. This will then bring you to the finished event page.


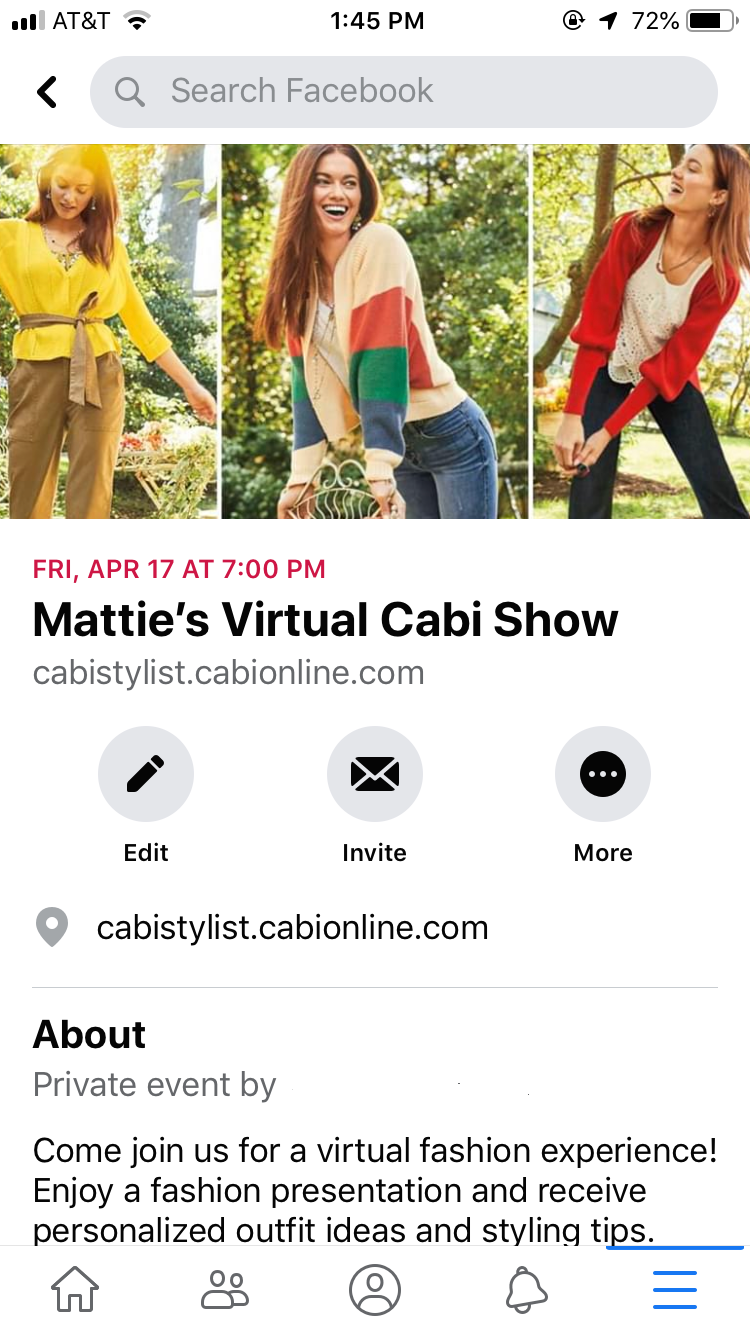
10. Once on the event page, you can invite guests by pressing “Invite”. Type in your guests’ names, and press on their profiles to add them as guests.


To post an update or information about your event, you can create a status that will be visible on the event’s page for all guests and co-hosts. This works just the same as creating any other Facebook status
Want one-on-one training or more help?
Promote Creatively offers Training sessions for Small Businesses and Special Rates for Cabi Stylists! Schedule a free 30-minute consultation here for more!


Comments